Defining pre-recorded poses
This page contains a step-by-step guide to define pre-recorded poses and cartesian poses for robot’s end-effector that you can use in the task editor.
Prerequisites
In this tutorial, we assume that a robot is already properly interfaced to GRIP (see here for the different integration modalities).
Procedure
The same editor allows you to create both simple poses or to create poses for the robot’s end-effector. The latest is mainly useful when you want to define the pose of different fingers of a robot hand for instance. After completing the common (and mandatory) steps, you can go to the corresponding subsections.
Common steps
In the
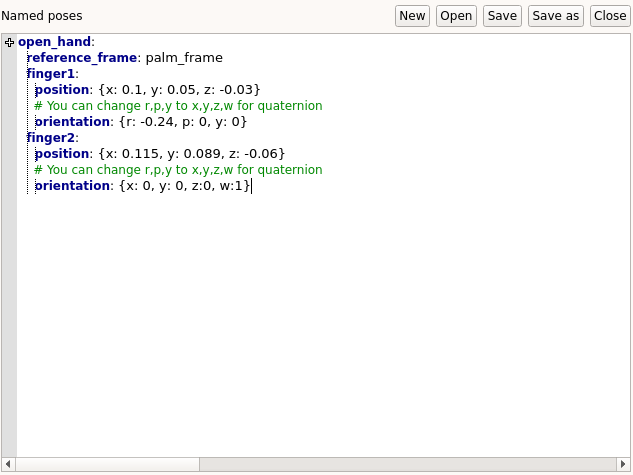
Settingstab, go to theNamed poseseditor and create a new file by clicking onNewIn the margin, click on the
+symbol and enter the name of the pose you want to createA template will appear in the editor. Fill in the
reference_framefield which corresponds to the frame used as the origin of the coordinates you will provide in the next steps
Simple pose
Fill in the
positionandorientationfields. If you want to declare the rotation of the pose using a quaternion, you can swap ther,pandykeys tox,y,zandw

Robot’s pose
Below
reference_frame, write the name of the end-effector for which you want to define the pose (you can define several). Each end effector must have the fieldspositionandorientation.
Note
Once defined in this editor, you can use the name of the poses in other editors to make things easier (e.g. in Sensors config editor). You will also be able to retrieve them in the task editor via their name.