Integrating an external software
This page contains a step-by-step guide to integrate an external software component to GRIP.
What is an external software
Note
This is the same procedure for controllers, kinematics libraries, motion planners (hardware configuration tabs) and for high-level methods (settings tab).
What you need before starting
The components to integrate wrapped inside ROS service/action servers compatible with GRIP (see here)
URDF file of the robot
Optional: A MoveIt! configuration package (if you don’t have one, see here)
Prerequisites
Examples will be provided using an EZGripper mounted on a UR5 robot arm. The arm will be operated via MoveIt! while the gripper will be operated through one external controller. If you want to replicate this tutorial, please clone this repository, this repository and this one in /home/user/projects/shadow_robot/base/src. Then compile them
cd /home/user/projects/shadow_robot/base catkin_make source devel/setup.bash
Procedure
Common steps
Start the framework:
roslaunch grip_api start_framework.launchSet the URDF file, robot’s composition and the MoveIt! configuration package (the latter is optional i.e. you don’t need it to integrate your own software)
Go to the editor in which you want to integrate your software in the tabs (
Arm configuration,Hand configurationorSettings)Create a new file in the selected one by clicking on
Newand save the file wherever you wantIn the margin, click on the
+symbol and enter the name of your software in the dialog. Make sure that the name you provide is different than the name of the .srv or .action file you provide in step 7.In the file dialog, specify the C++ or Python file (you can change the filter at the bottom of the file dialog) corresponding to your server (either action or service)
Still in the file dialog, specify the .srv or .action file that defines your service or action (you can change the filter at the bottom of the file dialog)
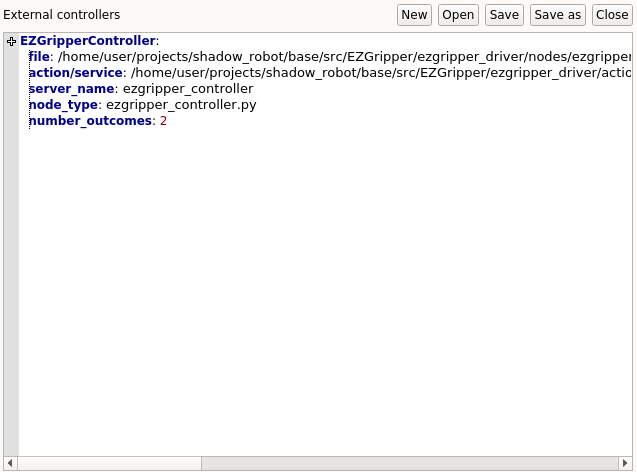
A partially filled template will appear in the editor. Fill
server_namewith the name you gave to your service or action. Fillnode_typewith the name of your node (C++ version) or with the name of your python file (with .py). Add the number of possible outcomes of your server (must be an integer greater or equal than 1). In the following example, we pointed to this action file and this server.
Hit the
Savebutton in the editor and here you are, your component is now integrated (i.e. you can see a state in theTask editortab that corresponds to your code). It means that your software will be run for you automatically!
Note
You do NOT need to have a MoveIt! configuration file, i.e. you can operate your robot only with external components!
Simulation
You can integrate any comppnent except for controllers (i.e. kinematics, motion planner and high level methods) in simulation mode! For more information see here.