Integrating a robot with MoveIt!
This page contains a step-by-step guide to integrate a robot using MoveIt!.
What you need before starting
Prerequisites
Examples will be provided using the Franka Panda arm and gripper. If you want to replicate this tutorial, please clone this repository, this repository and this one in /home/user/projects/shadow_robot/base/src. Then compile them
cd .. sudo apt install ros-kinetic-libfranka catkin_make source devel/setup.bash
Procedure
Common steps
Start the framework:
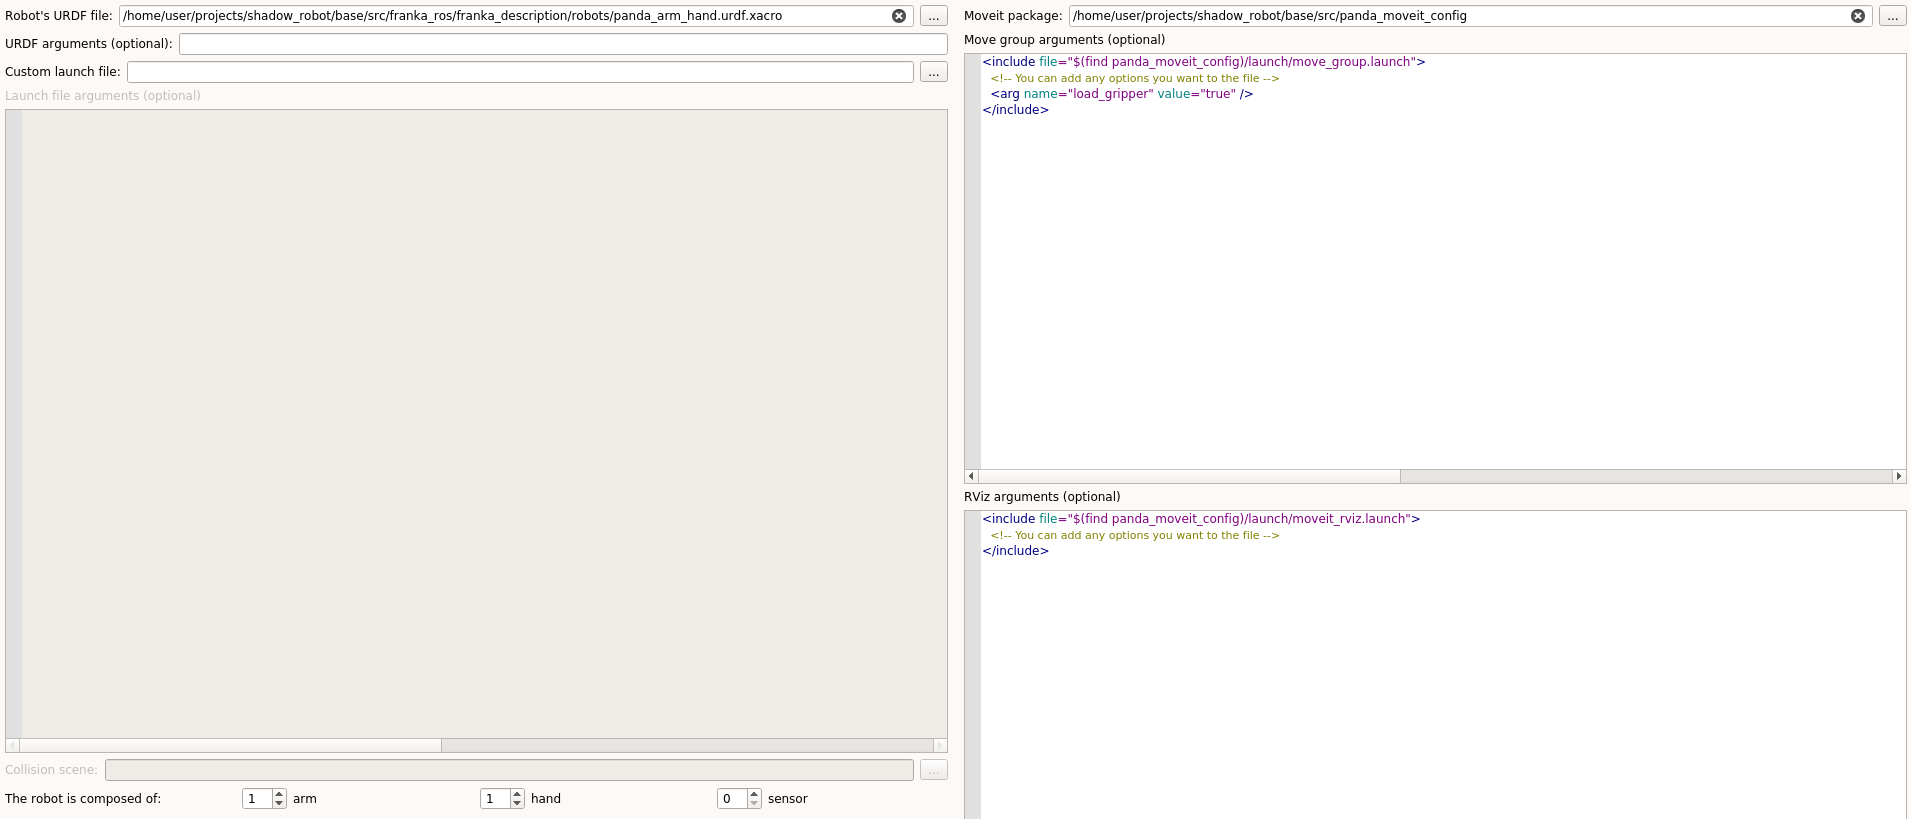
roslaunch grip_api start_framework.launchSpecify the URDF file of the robot to the framework
Set the composition of your robot(s), i.e. how many arms, hands and sensors need to be configured
Set the path to the MoveIt! configuration package in the corresponding field. You should now see two editors allowing you to provide further configuration options (only if you need to).
In each hardware config tab (arm and hand), set the corresponding ROS controllers you want to use.
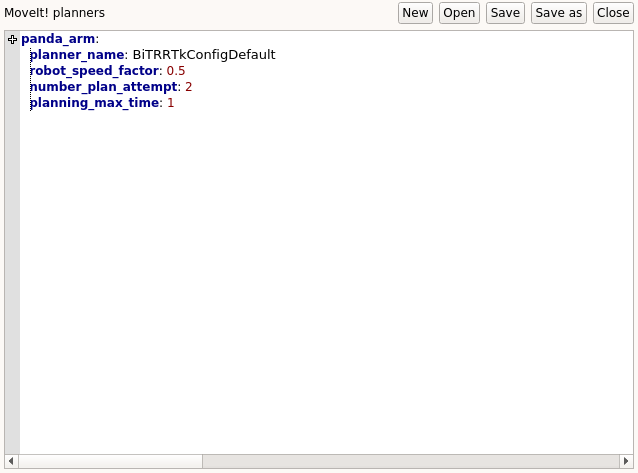
- Create (or load) a new motion planner config file for each part of the robot you want to operate with MoveIt!. Once the file is initialized in the editor, click on the + (in the margin) to add a new motion planner config. Follow the different dialogs and add the following information:
planner_name: Name of the OMPL-integrated planner you want to use. Available ones are listed in the MoveIt! configuration package, see here for instance.robot_speed_factor: Proportion of the maximum speed the robot can achieve. It sets the upper bound. The value must be smaller or equal to 1 and strictly greater than 0.number_plan_attempt: Number of plans that the motion planner is going to compute before returning a potential solution. Must be an integer.planning_max_time: Maximum time given to the planner to compute a solution. In seconds.
At this point, you should not be able to launch the robot yet. In fact, some steps differ whether you want to run your robot in simulation or not. Let’s go over them.
Simulation
ROS controllers
<transmission> tags, in which we define what kind of controller actuate each joint.<transmission> in the URDF file and use different ROS controller files. For the Franka panda arm, we provide an example of ROS controller file describing a torque controller.Warning
The PID and clamping values set in this file are correct only for simulation (they might even need some fine-tuning). If you want to use the torque controller of the real hardware, you need to find the proper PID values.
MoveIt! package
In order to avoid any error message make sure that the name of the controllers declared in the controllers.yaml of your MoveIt! configuration package match with the ROS controller file that you provide to the framework.
Physical robot
simulation box in the Robot interface tab.Note
GRIP provides natively a compatible hardware interface for Universal Robot arms.
Collision scene field that would provide a description of the environment.Testing the integration
Launch robot button enabled. Click on it (or press Ctrl+L). You should soon see either one or two windows appearing. If you are running the robot in simulation mode, you should first see a Gazebo window appearing, and then a RViz window. If you are running the real robot, you should only see the latter.MotionPlanning docker window on the left of the Rviz Window, press on the Planning tab, and hit on Plan and Execute. You should see your robot moving to the target pose you previously set.